
On InLinks you can provide access to several elements of your project depending on the aimed goal, the following highlights the different user access you can set up on InLinks.
Adding Writers (available in all plans)
Adding Full Users (available for Agency plans (level 4) and up)
Giving access to content briefs / audits to writers (available in all plans):
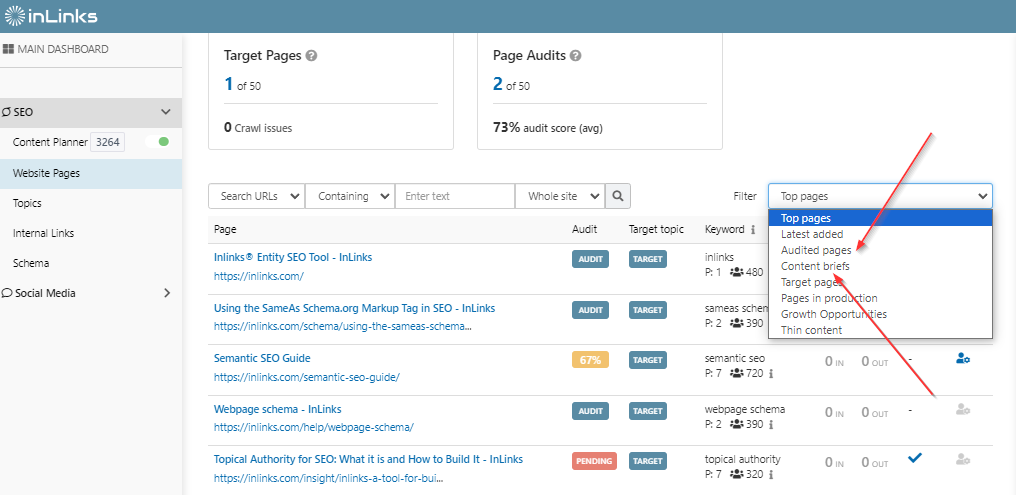
If you create a content brief or audit and wish to assign it to a writer, head to the ‘Website pages’ of your project and use the ‘Filter’ drop-down menu to display your content briefs or audits:
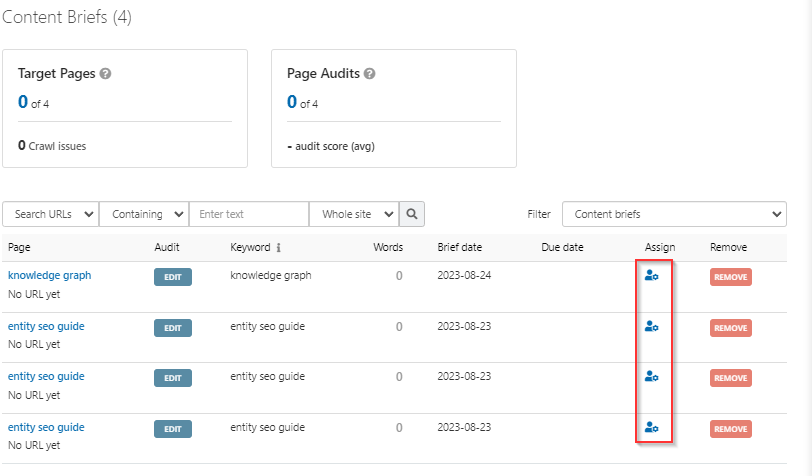
Use the little person’s logo under the ‘Assign‘ column for the one you’d like to give access to:
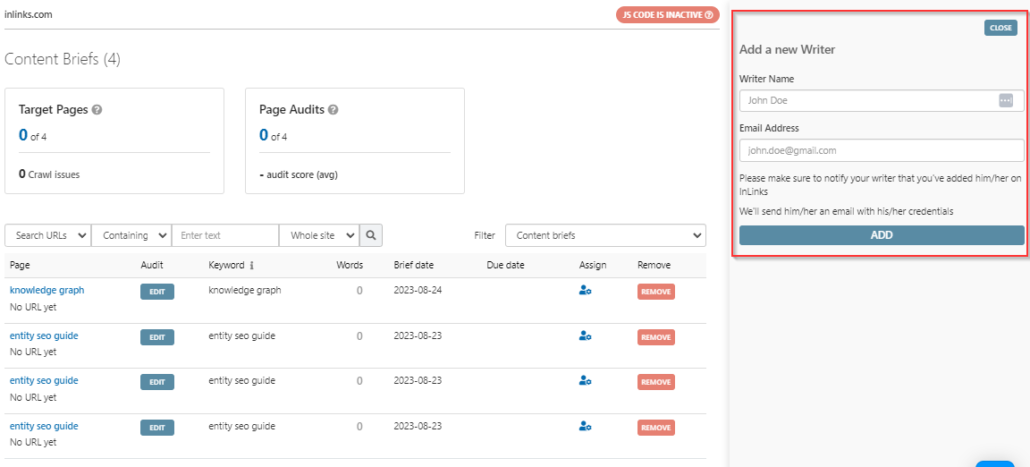
Then click on ‘Add a new writer‘ on the window that will appear, enter the writer’s name and email address and hit ‘Add’. The writer will receive an email with his / her credentials:
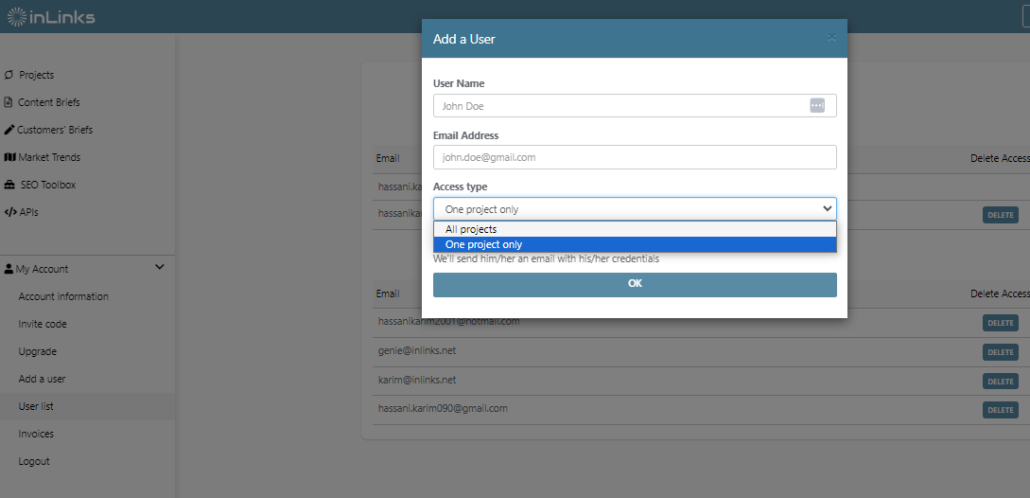
Add users to manage an InLinks project (available only for Agency plans and up):
If you’re on an Agency plan (level 4 plan) or up, you can add users to your account so that they can manage projects in the same way an admin would. Once you’re logged into your InLinks account you can add a user by unfolding the ‘My Account‘ menu then click on ‘Add a user‘, you’ll then be prompted to enter a name; an email and specify whether he / she will access all your projects or a specific one:
Each added user will receive an email with his / her credentials to access your account. In addition, each user will get individual support if he / she contacts our team via the chat window.
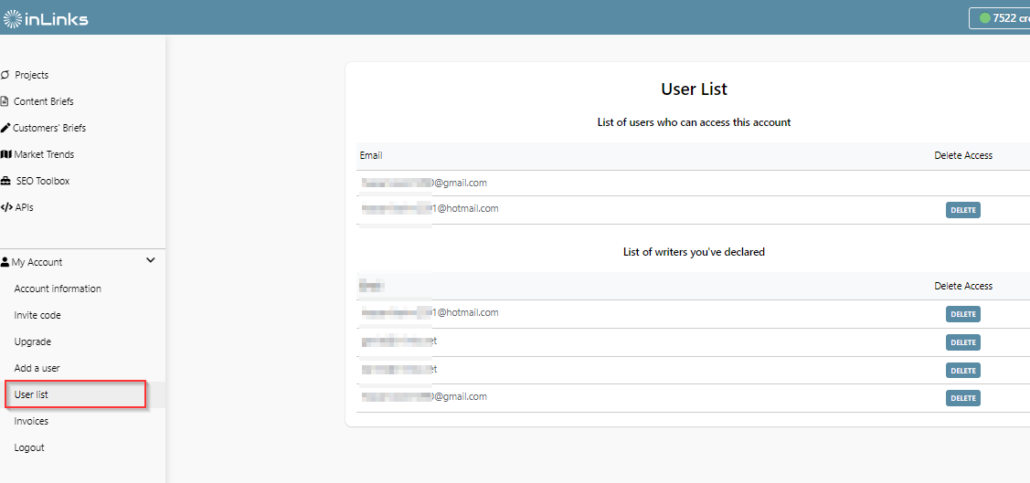
Removing access
If you wish to remove access to writers or users, head over to ‘User list‘ under ‘My account‘ and use the ‘Delete‘ buttons to remove users or writers from your account:

Leave a Reply
Want to join the discussion?Feel free to contribute!